props细节详解及注意事项
构造器中获取props数据
props是我们React父子组件之间通信的对象,那么这个对象在构造器constructor中是获取不到的。
1
2
3
4
5
6
7
8
9
10
11
12
13
14
| class Welcome extends React.Component {
constructor(){
super();
console.log( this.props.msg )
}
render(){
return (
<div>hello world, {this.props.msg}</div>
);
}
}
let element = (
<Welcome msg="hi react" />
);
|
可以通过给super()传递props参数是可以做到的,代码如下:
1
2
3
4
| constructor(props){
super(props);
console.log( this.props.msg )
}
|
那么React类组件是如何设计的呢?就要对面向对象非常的熟悉,原理分析如下:
1
2
3
4
5
6
7
8
9
10
11
12
13
14
15
16
17
18
19
20
21
| class Foo {
constructor(props){
this.props = props;
}
}
class Bar extends Foo {
constructor(props){
super(props);
console.log(this.props);
}
render(){
console.log(this.props);
return '';
}
}
let props = {
msg: 'hello world'
};
let b = new Bar(props);
b.props = props;
b.render();
|
多属性的传递
当有非常多的属性要传递的时候,那么会比较麻烦,所以可通过扩展运算形式进行简写。
1
2
3
4
5
6
7
8
9
10
11
12
13
14
15
16
17
| class Welcome extends React.Component {
render(){
let { msg, username, age } = this.props;
console.log( isChecked );
return (
<div>hello world, {msg}, {username}, {age}</div>
);
}
}
let info = {
msg: 'hi react',
username: 'xiaoming',
age: 20
};
let element = (
<Welcome {...info} />
);
|
给属性添加默认值与类型
1
2
3
4
5
6
7
8
9
10
| import PropTypes from 'prop-types'
class Welcome extends React.Component {
static defaultProps = {
age: 0
}
static propTypes = {
age: PropTypes.number
}
...
}
|
这里的类型需要引入第三方模块才可以生效。
当父子通信的时候,如果只写属性,不写值的话,那么对应的值就是布尔值true。
类组件中事件的使用详解
首先React中的事件都是采用事件委托的形式,所有的事件都挂载到组件容器上,其次event对象是合成处理过的。一般情况下这些都是内部完成的,我们在使用的时候并不会有什么影响,作为了解即可。
事件中this的处理
在事件中最重要的就是处理this指向问题了,这里我们推荐采用面向对象中的public class fields语法。
1
2
3
4
5
6
7
8
9
10
11
12
13
14
15
16
17
18
19
| class Welcome extends React.Component {
handleClick = (ev) => {
console.log(this);
}
handleClick(){
console.log(this);
}
render(){
return (
<div>
<button onClick={this.handleClick}>点击</button>
hello world
</div>
);
}
}
let element = (
<Welcome />
);
|
事件传参处理
推荐采用函数的高阶方式,具体代码如下:
1
2
3
4
5
6
7
8
9
10
11
12
13
14
15
16
17
18
| class Welcome extends React.Component {
handleClick = (num) => {
return (ev) => {
console.log(num);
}
}
render(){
return (
<div>
<button onClick={this.handleClick(123)}>点击</button>
hello world
</div>
);
}
}
let element = (
<Welcome />
);
|
state细节详解及React18的自动批处理
自动批处理
自动批处理,即有助于减少在状态更改时发生的重新渲染次数。在React18之前也有批处理的,但是在Promise、setTimeout、原生事件中是不起作用的。
实际上自动批处理指的是,同一时机多次调用setState()方法的一种处理机制。
1
2
3
4
5
6
7
8
| handleClick = () => {
this.setState({
msg: 'hi'
});
this.setState({
count: 1
});
}
|
这里的代码当点击触发后,虽然调用了两次setState()方法,但是只会触发一次render()方法的重新执行。那么这就是所谓的自动批处理机制,这样是有助于性能的,减少重新执行的次数。
而且不管在什么时机下,都不会有问题的,这个在React18版本之前并不是所有的情况都好用的,比如:定时器。
1
2
3
4
5
6
7
8
9
10
| handleClick = () => {
setTimeout(()=>{
this.setState({
msg: 'hi'
});
this.setState({
count: 1
});
}, 2000)
}
|
上面代码在React18之前的版本中,将会触发两次render()方法。默认是自动批处理的,当然也可以改成不是自动批处理的方式,通过ReactDOM.flushSync这个方法。
1
2
3
4
5
6
7
8
9
10
11
12
| handleClick = () => {
ReactDOM.flushSync(()=>{
this.setState({
msg: 'hi'
});
})
ReactDOM.flushSync(()=>{
this.setState({
count: 1
});
})
}
|
异步处理
既然React18对多次调用采用的是自动批处理机制,那么就说明这个setState()方法是异步的,所以要注意方法调用完后,我们的state数据并不会立即发生变化,因为state可能会被先执行了。
1
2
3
4
5
6
7
8
9
10
11
| handleClick = () => {
this.setState({
count: this.state.count + 1
}, ()=>{
console.log( this.state.count );
});
}
|
可利用setState()方法的第二个参数来保证数据更新后再去执行。这里还要注意同样的数据修改只会修改一次,可利用setState()的回调函数写法来保证每一次都能触发。
1
2
3
4
5
6
7
8
9
10
11
12
13
14
| handleClick = () => {
this.setState((state)=> ({count: state.count + 1}));
this.setState((state)=> ({count: state.count + 1}));
this.setState((state)=> ({count: state.count + 1}));
}
|
这样页面按钮点击一次,count会从0直接变成了3。
PureComponent与shouldComponentUpdate
PureComponent与shouldComponentUpdate这两个方法都是为了减少没必要的渲染,React给开发者提供了改善渲染的优化方法。
shouldComponentUpdate
当我们在调用setState()方法的时候,如果数据没有改变,实际上也会重新触发render()方法。
1
2
3
4
5
6
7
8
9
10
11
12
13
14
15
16
17
18
19
20
21
22
23
| class Welcome extends React.PureComponent {
state = {
msg: 'hello',
count: 0
}
handleClick = () => {
this.setState({
msg: 'hello'
});
}
render(){
console.log('render');
return (
<div>
<button onClick={this.handleClick}>点击</button>
{this.state.msg}, {this.state.count}
</div>
);
}
}
let element = (
<Welcome />
);
|
上面的render()方法还是会不断的触发,但是实际上这些render触发是没有意义的,所以可以通过shouldComponentUpdate钩子函数进行性能优化处理。
1
2
3
4
5
6
7
8
9
10
11
12
13
14
15
16
17
18
19
20
21
22
23
24
25
26
27
28
29
30
31
| class Welcome extends React.Component {
state = {
msg: 'hello',
count: 0
}
handleClick = () => {
this.setState({
msg: 'hi'
});
}
shouldComponentUpdate = (nextProps, nextState) => {
if(this.state.msg === nextState.msg){
return false;
}
else{
return true;
}
}
render(){
console.log('render');
return (
<div>
<button onClick={this.handleClick}>点击</button>
{this.state.msg}, {this.state.count}
</div>
);
}
}
let element = (
<Welcome />
);
|
shouldComponentUpdate()方法的返回值,如果返回false就不进行界面的更新,如果返回true就会进行界面的更新。这样就可以根据传递的值有没有改变来决定是否进行重新的渲染。
PureComponent
PureComponent表示纯组件,当监控的值比较多的时候,自己去完成判断实在是太麻烦了,所以可以通过PureComponent这个内置的纯组件来自动完成选择性的渲染,即数据改变了重新渲染,数据没改变就不重新渲染。
1
2
3
4
5
6
7
8
9
10
11
12
13
14
15
16
17
18
19
20
21
22
23
| class Welcome extends React.PureComponent {
state = {
msg: 'hello',
count: 0
}
handleClick = () => {
this.setState({
msg: 'hi'
});
}
render(){
console.log('render');
return (
<div>
<button onClick={this.handleClick}>点击</button>
{this.state.msg}, {this.state.count}
</div>
);
}
}
let element = (
<Welcome />
);
|
改成了纯组件后,记得不要直接对数据进行修改,必须通过setState()来完成数据的改变,不然纯组件的特性就会失效。
1
2
3
4
5
6
7
8
9
10
11
12
13
14
15
16
17
18
19
20
21
22
23
24
25
26
27
28
29
30
31
32
33
| class Welcome extends React.PureComponent {
state = {
msg: 'hello',
count: 0,
list: ['a', 'b', 'c']
}
handleClick = () => {
}
render(){
console.log('render');
return (
<div>
<button onClick={this.handleClick}>点击</button>
<ul>
{
this.state.list.map((v, i)=> <li key={i}>{v}</li>)
}
</ul>
</div>
);
}
}
let element = (
<Welcome />
);
|
immutable.js不可变数据集合
在上一个小节中,我们对数组进行了浅拷贝处理,这样可以防止直接修改数组的引用地址。但是对于深层次的对象就不行了,需要进行深拷贝处理。
但是常见的深拷贝处理机制,对于性能或功能性上都有一定的制约性,所以不复杂的数据,我们直接就可以选择用lodash库中提供的深拷贝方法处理就可以了。但是对于复杂的对象就需要拷贝性能问题,这就可以用到本小节中介绍的immutable.js不可变数据集合。
immutable.js库
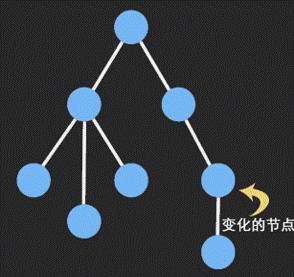
Immutable 是 Facebook 开发的不可变数据集合。不可变数据一旦创建就不能被修改,使得应用开发更简单,允许使用函数式编程技术,比如惰性评估。Immutable JS 提供一个惰性 Sequence,允许高效的队列方法链,类似 map 和 filter ,不用创建中间代表。
具体是如何做到高效的,可以参考图示。
immutablejs
下面就来看一下immutable.js的基本使用吧,代码如下:
1
2
3
4
5
6
7
8
9
10
11
12
13
14
15
16
17
18
19
20
21
22
23
24
25
26
27
28
29
30
31
32
33
| import Immutable from 'immutable'
class Head extends React.PureComponent {
render(){
console.log('render');
return (
<div>head component, {this.props.item.get('text')} </div>
);
}
}
class Welcome extends React.PureComponent {
state = {
msg: 'hello',
count: 0,
list: Immutable.fromJS([
{ id: 1, text: 'aaa' }
])
}
handleClick = () => {
let list = this.state.list.setIn([0, 'text'], 'bbb');
this.setState({
list
});
}
render(){
return (
<div>
<button onClick={this.handleClick}>点击</button>
<Head item={this.state.list.get(0)} />
</div>
);
}
}
|
主要就是通过Immutable.fromJS()先把对象转成immutable对象,再通过setIn()方法来设置数据,get()方法来获取数据。
Refs操作DOM及操作类组件
React操作原生DOM跟Vue框架是类似的,都是通过ref属性来完成的,主要使用React.createRef()这个方法和callbackRef()这个回调函数写法。
React.createRef()
这个方法可以创建一个ref对象,然后把这个ref对象添加到对应的JSX元素的ref属性中,就可以控制原生DOM了。
1
2
3
4
5
6
7
8
9
10
11
12
13
14
15
| class Welcome extends React.Component {
myRef = React.createRef()
handleClick = () => {
this.myRef.current.focus();
}
render(){
return (
<div>
<button onClick={this.handleClick}>点击</button>
<input type="text" ref={this.myRef} />
</div>
);
}
}
|
回调函数写法
还可以编写一个回调函数来完成,原生DOM的操作。
1
2
3
4
5
6
7
8
9
10
11
12
13
14
15
16
| class Welcome extends React.Component {
callbackRef = (element) => {
element.focus();
}
handleClick = () => {
this.myRef.focus();
}
render(){
return (
<div>
<button onClick={this.handleClick}>点击</button>
<input type="text" ref={this.callbackRef} />
</div>
);
}
}
|
Ref操作类组件
除了可以把ref属性添加到JSX元素上,还可以把ref属性添加到类组件上,那么这样可以拿到类组件的实例对象。
1
2
3
4
5
6
7
8
9
10
11
12
13
14
15
16
17
18
19
20
21
22
23
24
| class Head extends React.Component {
username = 'xiaoming';
render(){
return (
<div>head component</div>
);
}
}
class Welcome extends React.Component {
myRef = React.createRef()
handleClick = () => {
console.log(this.myRef.current);
console.log(this.myRef.current.username);
}
render(){
return (
<div>
<button onClick={this.handleClick}>点击</button>
<Head ref={this.myRef} />
</div>
);
}
}
|
这样可以间接的实现父子组件之间的数据通信。
ref属性还可以进行转发操作,可以把ref传递到组件内,获取到子组件的DOM元素。
1
2
3
4
5
6
7
8
9
10
11
12
13
14
15
16
17
18
19
20
21
| class Head extends React.Component {
render(){
return (
<div ref={this.props.myRef}>head component</div>
);
}
}
class Welcome extends React.Component {
myRef = React.createRef()
handleClick = () => {
console.log(this.myRef.current);
}
render(){
return (
<div>
<button onClick={this.handleClick}>点击</button>
<Head myRef={this.myRef} />
</div>
);
}
}
|
详解常见生命周期钩子函数
在学习Vue的时候,我们就已经介绍了生命周期钩子函数的概念,React中也存在一些钩子函数。我们可以为类组件声明一些特殊的方法,当组件挂载、更新或卸载时就会去执行这些函数。
要想学习React类组件的生命周期钩子函数,可以参考生命周期图谱。地址:https://projects.wojtekmaj.pl/react-lifecycle-methods-diagram/

常见生命周期图谱
生命周期主要分为三个阶段:
挂载时对应的钩子函数有:constructor,render,componentDidMount。
更新时对应的钩子函数有:render,componentDidUpdate
卸载时对应的钩子函数有:componentWillUnmount
可以看到挂载时和更新时都有render这个方法。这就是为什么state改变的时候,会触发render重渲染操作。
1
2
3
4
5
6
7
8
9
10
11
12
13
14
15
16
17
18
19
20
21
22
23
24
25
26
27
28
29
30
31
32
33
34
35
36
| class Welcome extends React.Component {
state = {
msg: 'hello world'
}
constructor(props){
super(props);
console.log('constructor');
}
componentDidMount = () => {
console.log('componentDidMount');
}
componentDidUpdate = () => {
console.log('componentDidUpdate');
}
componentWillUnmount = () => {
console.log('componentWillUnmount');
}
handleClick = () => {
root.unmount();
}
render(){
console.log('render');
return (
<div>
<button onClick={this.handleClick}>点击</button>
{ this.state.msg }
</div>
);
}
}
|
详解不常见生命周期钩子函数
不常见的生命周期钩子函数有以下几个:
- getDerivedStateFromProps:props派生state的值
- shouldComponentUpdate:优化render渲染次数
- getSnapshotBeforeUpdate:DOM更新前的快照
getDerivedStateFromProps
这个钩子主要是由props来决定state的值,这个需求比较少,下面来看例子。
1
2
3
4
5
6
7
8
9
10
11
12
13
14
15
16
17
18
19
20
21
22
23
24
25
26
27
28
29
30
31
32
33
34
| class Welcome extends React.Component {
state = {
isAdd: false,
lastNow: 0
}
static getDerivedStateFromProps = (props, state) => {
return {
isAdd: props.currentNow > state.lastNow,
lastNow: props.currentNow
}
}
render(){
return (
<div>
{ this.state.isAdd ? '累加' : '累减' }, { this.state.lastNow }
</div>
);
}
}
let now = 0;
let dir = 1;
setInterval(()=>{
if(now === 0){
dir = 1;
}
else if(now === 5){
dir = -1;
}
now += dir;
let element = (
<Welcome currentNow={now} />
);
root.render(element);
}, 1000)
|
通过props的变化来决定state的值,可以完成一些界面的更新操作。
shouldComponentUpdate
根据返回的结果的不同,选择性进行渲染,是进行性能优化的一种手段,这个钩子在前面学习PureComponent小节中就已经学习到了,这里不再赘述该如何使用。
getSnapshotBeforeUpdate
这个钩子可以触发DOM更新前的快照,可以把更新前的一些数据通过return提供出来,并通过componentDidUpdate钩子的第三个参数进行接收。
可以利用这一点来进行DOM前后对比的差异比较,代码如下:
1
2
3
4
5
6
7
8
9
10
11
12
13
14
15
16
17
18
19
20
21
22
23
24
25
26
27
| class Welcome extends React.Component {
state = {
list: ['a', 'b', 'c']
}
myRef = React.createRef()
handleClick = () => {
this.setState({
list: [...this.state.list, 'd', 'e', 'f']
})
}
getSnapshotBeforeUpdate = (props, state) => {
return this.myRef.current.offsetHeight;
}
componentDidUpdate = (props, state, snapshot) => {
console.log( this.myRef.current.offsetHeight - snapshot );
}
render(){
return (
<div>
<button onClick={this.handleClick}>点击</button>
<ul ref={this.myRef}>
{ this.state.list.map((v, i)=> <li key={i}>{v}</li>) }
</ul>
</div>
);
}
}
|
组件内容的组合模式
React组件也是可以进行内容分发的,但是并不想Vue一样通过插槽来进行接收,而是通过props.children这个属性进行接收的。
1
2
3
4
5
6
7
8
9
10
11
12
13
14
| class Welcome extends React.Component {
render(){
return (
<div>
hello world, { this.props.children }
</div>
);
}
}
let element = (
<Welcome>
<h2>这是一个标题</h2>
</Welcome>
);
|
那么如何进行多内容的分区域处理呢?也就是Vue中多插槽的概念。这个就不能利用props.children来实现了,只能采用React模板的能力,通过传递JSX元素的方式进行实现。
1
2
3
4
5
6
7
8
9
10
11
12
13
14
| class Welcome extends React.Component {
render(){
return (
<div>
{ this.props.title }
hello world
{ this.props.content }
</div>
);
}
}
let element = (
<Welcome title={ <h2>这是一个标题</h2> } content={ <p>这是一个段落</p> } />
);
|
复用组件功能之Render Props模式
Render Props模式
术语 “render props” 是指一种在 React 组件之间使用一个值为函数的 prop 共享代码的简单技术。利用这种方式可以实现组件之间的功能复用操作。
1
2
3
4
5
6
7
8
9
10
11
12
13
14
15
16
17
18
19
20
21
22
23
24
25
26
27
28
29
30
31
32
33
34
35
36
37
38
39
| class MouseXY extends React.Component {
state = {
x: 0,
y: 0
}
componentDidMount = () => {
document.addEventListener('mousemove', this.move)
}
componentWillUnmount = () => {
document.removeEventListener('mousemove', this.move)
}
move = (ev) => {
this.setState({
x: ev.pageX,
y: ev.pageY
});
}
render(){
return (
<React.Fragment>
{ this.props.render(this.state.x, this.state.y) }
</React.Fragment>
);
}
}
class Welcome extends React.Component {
render(){
return (
<MouseXY render={(x, y)=>
<div>
hello world, {x}, {y}
</div>
} />
);
}
}
let element = (
<Welcome />
);
|
主要就是render属性后面的值是一个回调函数,通过这个函数的形参可以得到组件中的数据,从而实现功能的复用。
复用组件功能之HOC高阶组件模式
HOC高阶组件
除了Render Props模式可以复用组件外,还可以利用HOC高阶组件来实现,他是React 中用于复用组件逻辑的一种高级技巧,具体而言,就是参数为组件,返回值为新组件的函数。
1
2
3
4
5
6
7
8
9
10
11
12
13
14
15
16
17
18
19
20
21
22
23
24
25
26
27
28
29
30
31
32
33
34
35
36
| function withMouseXY(WithComponent){
return class extends React.Component {
state = {
x: 0,
y: 0
}
componentDidMount = () => {
document.addEventListener('mousemove', this.move)
}
componentWillUnmount = () => {
document.removeEventListener('mousemove', this.move)
}
move = (ev) => {
this.setState({
x: ev.pageX,
y: ev.pageY
})
}
render(){
return <WithComponent {...this.state} />
}
}
}
class Welcome extends React.Component {
render(){
return (
<div>
hello world, { this.props.x }, { this.props.y }
</div>
);
}
}
const MouseWelcome = withMouseXY(Welcome)
let element = (
<MouseWelcome />
);
|
组件跨层级通信方案Context
Context通信
前面我们学习了父子组件之间的通信,有时候我们需要多层组件之间的嵌套,那么如果从最外层一层一层的把数据传递到最内层的话势必会非常的麻烦。
所以context的作用就是解决这个问题,可以把数据直接从最外层传递给最内层的组件。
1
2
3
4
5
6
7
8
9
10
11
12
13
14
15
16
17
18
19
20
21
22
23
24
25
26
27
28
29
30
31
32
33
34
35
36
37
38
39
40
41
42
| let MyContext = React.createContext();
class Welcome extends React.Component {
state = {
msg: 'welcome组件的数据'
}
render(){
return (
<div>
Hello Welcome
<MyContext.Provider value={this.state.msg}>
<Head />
</MyContext.Provider>
</div>
);
}
}
class Head extends React.Component {
render(){
return (
<div>
Hello Head
<Title />
</div>
);
}
}
class Title extends React.Component {
static contextType = MyContext
componentDidMount = () => {
console.log( this.context );
}
render(){
return (
<div>
Hello Title <MyContext.Consumer>{ value => value }</MyContext.Consumer>
</div>
);
}
}
let element = (
<Welcome />
);
|
这里传递的语法,是通过<MyContext.Provider>组件携带value属性进行向下传递的,那么接收的语法是通过<MyContext.Consumer>组件。
也可以定义一个静态方法static contextType = MyContext,这样就可以在逻辑中通过this.context来拿到同样的值。